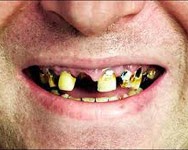
If it didn't you can still use the exact images used in this tutorial instead. We have used just 5 different images to create the zombie effect; see the thumbnails below of a face, a leaf, a ham, bad teeth and stitches.

1. The first stage of this tutorial involves darkening around the eyes to give a creepy and deathly look to the face. To do this use the dodge tool and use the brush settings to set the hardness to a low value, something below 20%. This ensures that the effect achieved by using the dodge tool will blend better with the existing image (see below) and not look patchy as it would with a high level of hardness.
2. Now that we have focussed in on the eyes by darkening around them we want to select the eyes so we can edit their colouration. Use the quick selection tool to select the left eye then, while still on the quick selection tool, click the add to selection button at the top of the page and then select the right eye.
3. With the eyes selected go to Image -> Adjustments -> Colour Balance and set the levels to those shown in the image below. You can of course use other settings to achieve a colouration that you are happy with. Once the eyes are of a suitably surreal colouration the effect will be achieved. That completes the work on the face.
4. Next up we need to add the leaf image to the canvas. To do this simply open it in Photoshop then drag and drop it onto the face image using the move tool. Once it is on the same canvas as the face ensure it's layer is above the face layer then set the blending mode to Multiply and the Opacity to 50% or lower. This will allow the face to come through while also retainging the darker areas of the leaf image (the veins) to remain strong. If necessary, use Edit-> Transform-> Scale to scale up the leaf to ensure it covers the face. Finally use the eraser tool, setting its hardness to below 50%, and erase any parts of the leaf image not overlapping the face.
5. The ham image is now used to create the effect of a scar running down the side of the face. Add the image to the canvas in the same way as the leaf image and once again set the blend mode to Multiply. Next use the move tool and Edit-> Transform-> Rotate to position the 'scar' where you would like. Finally use the eraser tool, once again setting the hardness to below 50% and remove the edges of the image to allow it to blend into the overall image.
6. The stitches can now be added in exactly the same way as the 'scar'. I have added two but you can add as many as you like!
7. Finally the teeth, if you could still call them that! Once again add the image to the canvas as before. Use the eraser tool, once again setting the hardness to below 50%, to remove the area outside of the mouth. Now resize it to approximately the same same as the mouth in the original face image using Edit-> Transform-> Scale and position it below the existing mouth area. Depending on the initial image and the teeth image you are using will you now need to use a combination of the Edit-> Transform tools such as scale, rotate, skew and perspective to carefully set up the mouth/teeth to a suitable size and position.
The image bleow shows the completed zombie image alongside its Photoshop Layers.
Once you are done why not try adding the image into another photograph or scene. Here are a few variations to get you started.


